Tag: xixun LED softwear, LED control system configuration, LED outdoor billboard softwear setting

VERYPIXEL is specialized in LED display R& D, production and manufacturing companies, we are committed to providing customers with a variety of ☞ LED Display Solutions ☜ , and to provide you with quality products pre-sales, after-sales service.
The configuration files of the control card are all set when the LED display is come out of the factory. You could edit the video and send it directly. (Please check NO.18 to know how to edit your video.) If the display is abnormal or is not a full screen, please set your configuration files separately.
NO.1 when using the network connection to control, you should set the computer’s IP address on the same segment of the control card’s IP address. Xixun control card in the segment “0”and you could set as the following picture.
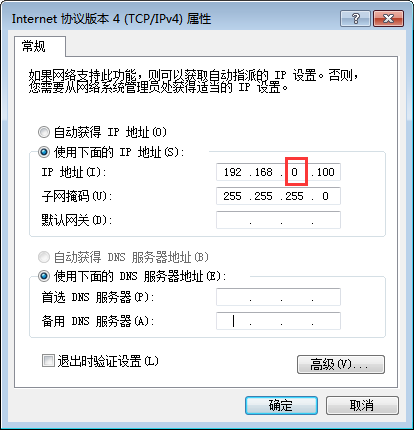
Recommended: 192.168.0.100
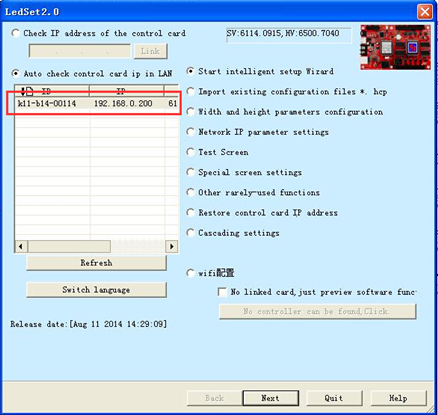
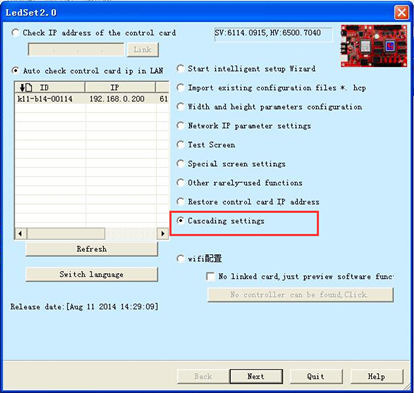
NO.2 After setting the computer’s IP address, please open the set up “LedSet2.0”.

NO.3 After opening the LedSet2.0, if the the IP addresses of PC and control card are on the same segment and the cable is working, you could see the software is connected with the control card.
NO.4 After connecting with the control card, import the LED display configuration files we provided to PC directly. (Verypixel would offer you the data disc along with the shipment.)
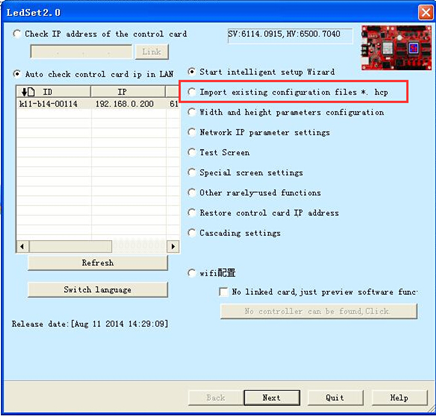
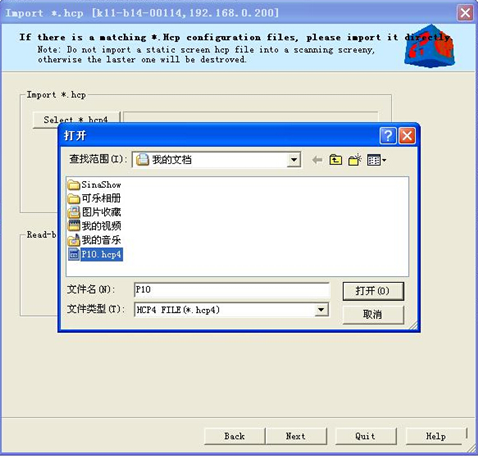
NO.5 Loading the corresponding configuration files directly.
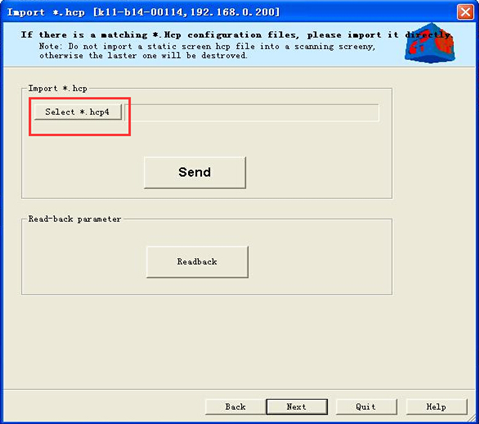
NO.6 Select the corresponding configuration files matching LED display model.
NO.7 After loading, please click “send”, and the control system would restart automatically. After a few seconds, please click “next” to continue.
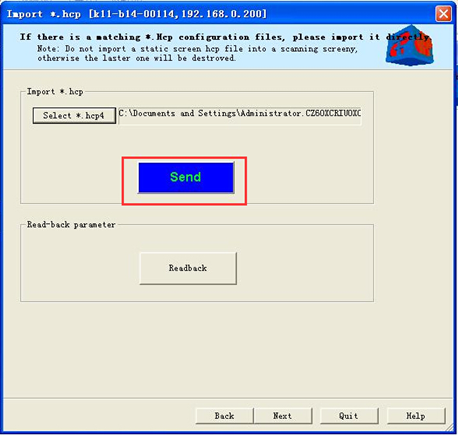
NO.8 After restarted, the configuration files were set. Next is to set the width and height of control card’s parameters configuration.

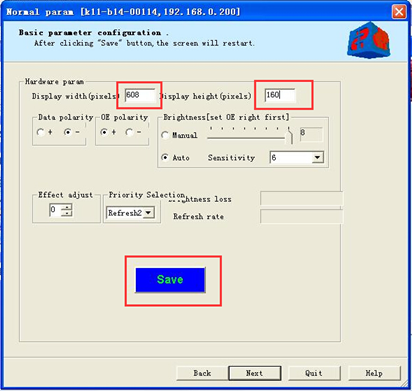
NO.9 Configuring the whole LED screen pixel resolution (width and height) and then click “Save”. . The control system would restart again. Wait a few seconds; please click “Next” to continue.
NO.10 Completed sending card settings; it is time to configure cascading settings of receiving cards.
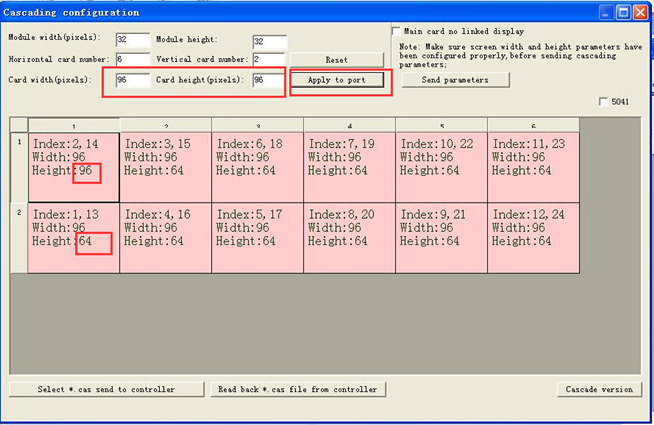
NO.11 Entering into the cascading configuration window. First, figure out the number of horizontal and vertical cards the LED display used and the actual pixels of each card can load (width and height). Please note the serial number.
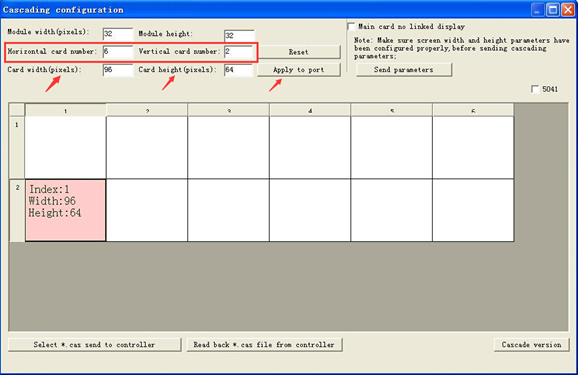
The first receiving card connected to the main cable is number 1. Then connect them together in the order of cable route. Clicking the left mouse button is to add, while right is to cancel. (F5 on keyboard is to set the sending card only but no receiving card use.)
NO.12 Watching straight on the LED display and click the section where the main cable first into the receiving card from the sending card.
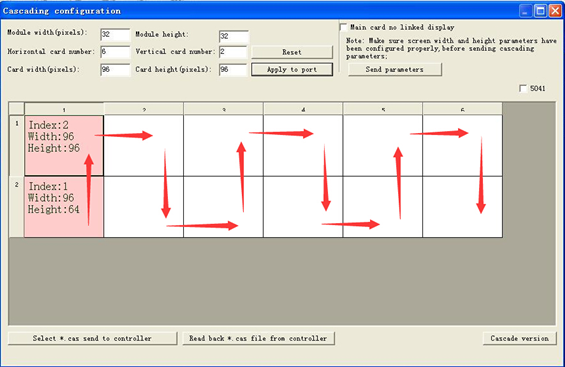
No.13 Click the corresponding window in sequence and it would be the order of the first display.
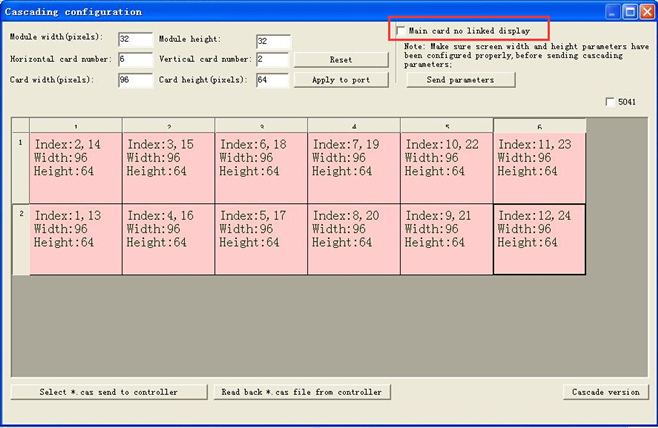
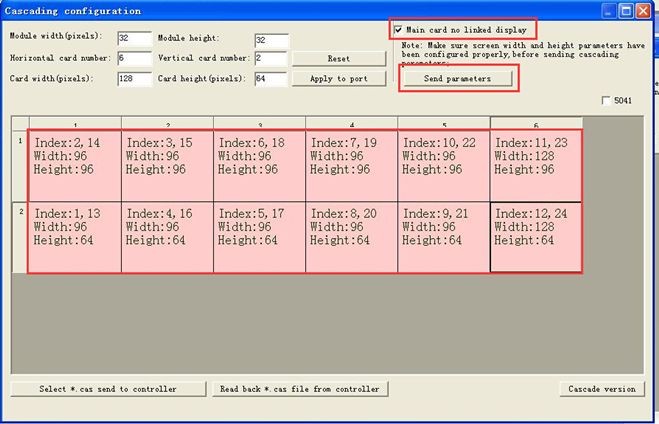
NO.14 If it is double face display which shows the same content, please click the left mouse button and click according to the order of receiving card of the second display. Then press F5 on the keyboard and tick “Main card no linked display”.
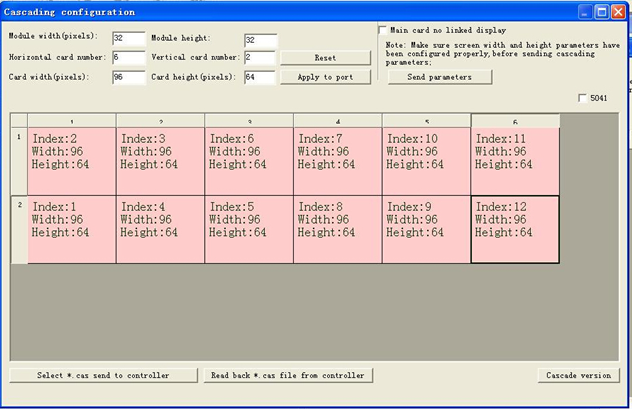
NO.15 Finally, configuring the display corresponding parameter in terms of each card’s load capacity of the actual pixel. Please note that even one mistake could fail to form a full screen. (Clicking the left mouse button is to add, while right is to cancel.)
NO.16 Check the parameter carefully. When confirmed, please click “send parameters”.
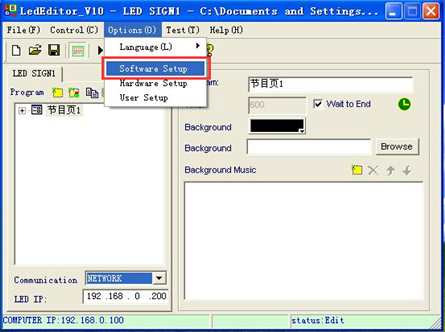
NO.17 After completing set up the parameters of sending cards and receiving cards. Next is to edit the videos. Please double-click the Led Editor software.

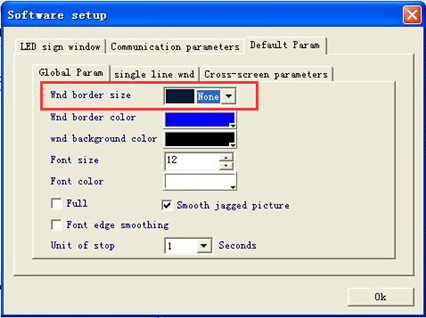
NO.18 After opening the software, please set the window size of the video first. The window size should correspond to the actual screen otherwise it would fail to send the video.
NO.19 The actual width and height pixels of the LED display.
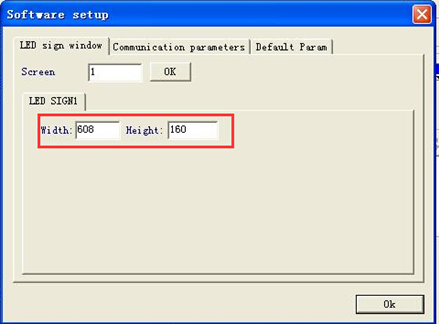
NO.20 Common video does not contain window border. You could switch “none”.
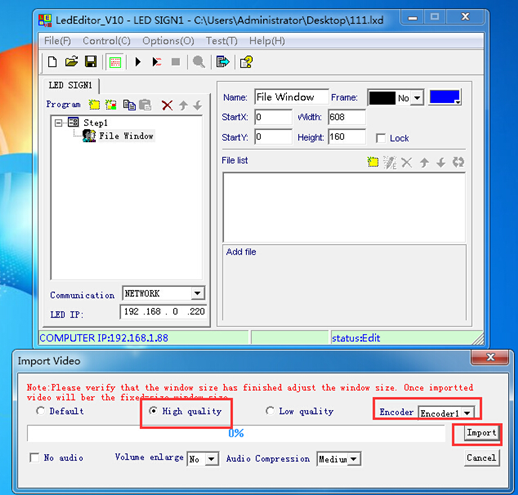
NO.21 After setting, you could use cable or USB flash disk to display and change the program. Please save the program catalogue before importing the corresponding video. The software would prompt you to decode and import. After uploading, you could watch the preview.
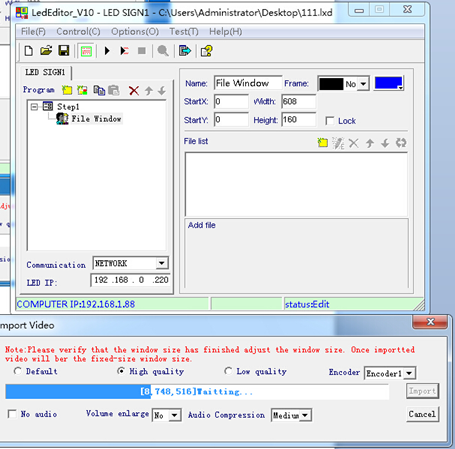
NO.22 The video is decoding.
NO.23 Click “Send” if the preview has no problem.
